
To apply for WhatsApp Business API using Automate AI, it’s essential that you have an approved Facebook Business Manager account.
Without an approved account, Meta limits your messaging to just 250 users per broadcast. With a verified account, you can scale to unlimited users via Tier upgrades.
Let’s walk you through the easy steps to create your Facebook Business Manager account.
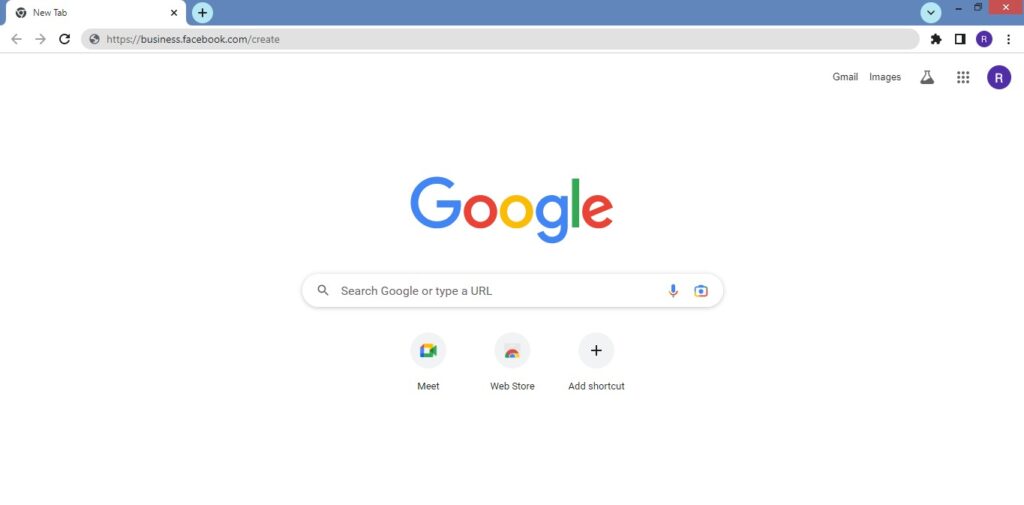
Step 1: Go to the Facebook Business Signup Page
Visit: https://business.facebook.com/create
This is the official link to create your business account on Facebook.
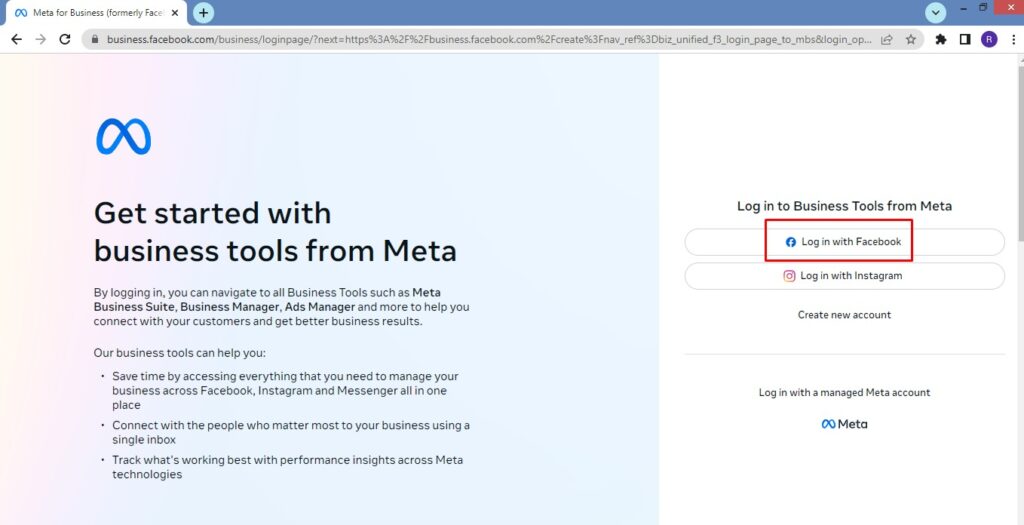
2. Click ‘Log in with Facebook’
Next, you’ll need to login to your Facebook account. Click the button Log in with Facebook to proceed ahead.
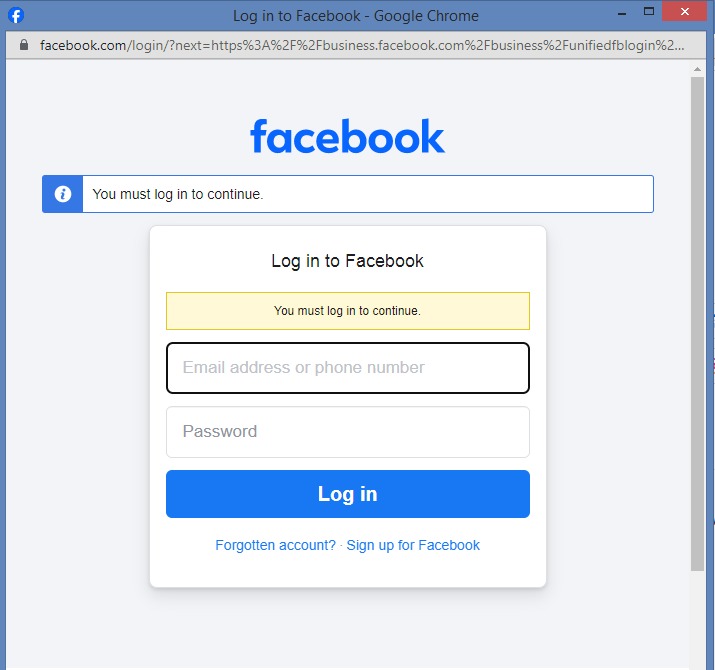
3. Log in to your Facebook account
Enter your Facebook login credentials to log in. Make sure to you log in with the account on which you wish to create your Facebook Business manager account.
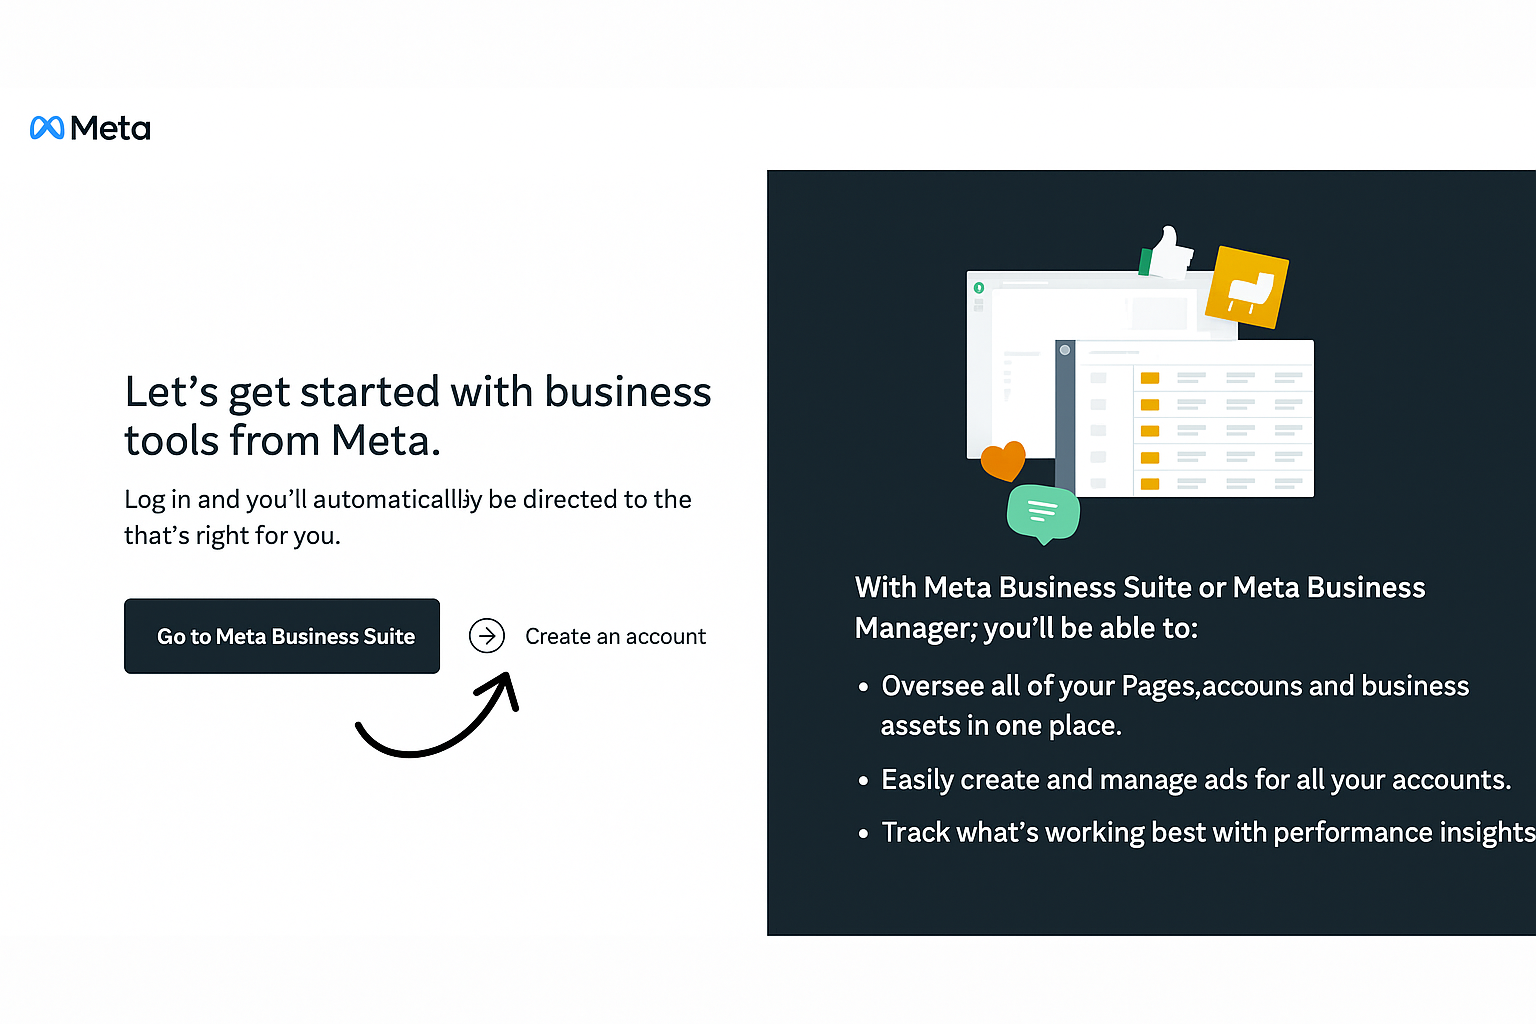
Step 4: Click “Create an Account”
Once logged in, click on Create an Account to begin your business manager setup.
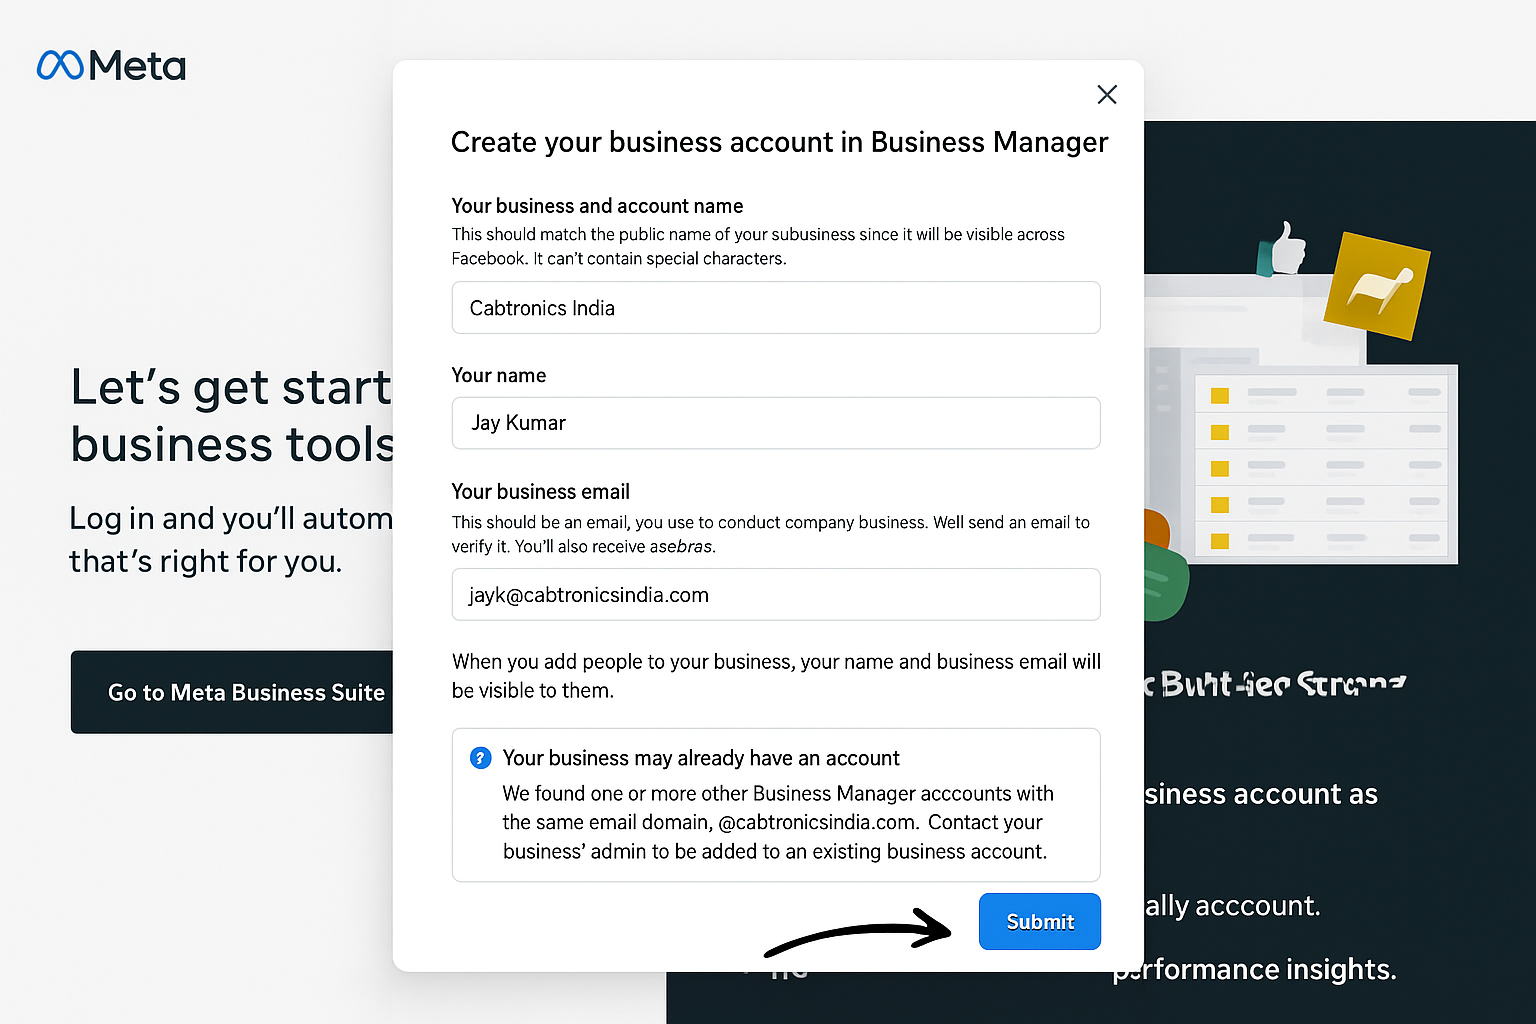
Step 5: Fill Out Your Business Details
Add your:
-
Business Name
-
Your Full Name
-
Work Email (used for Meta communication)
Then click Submit.
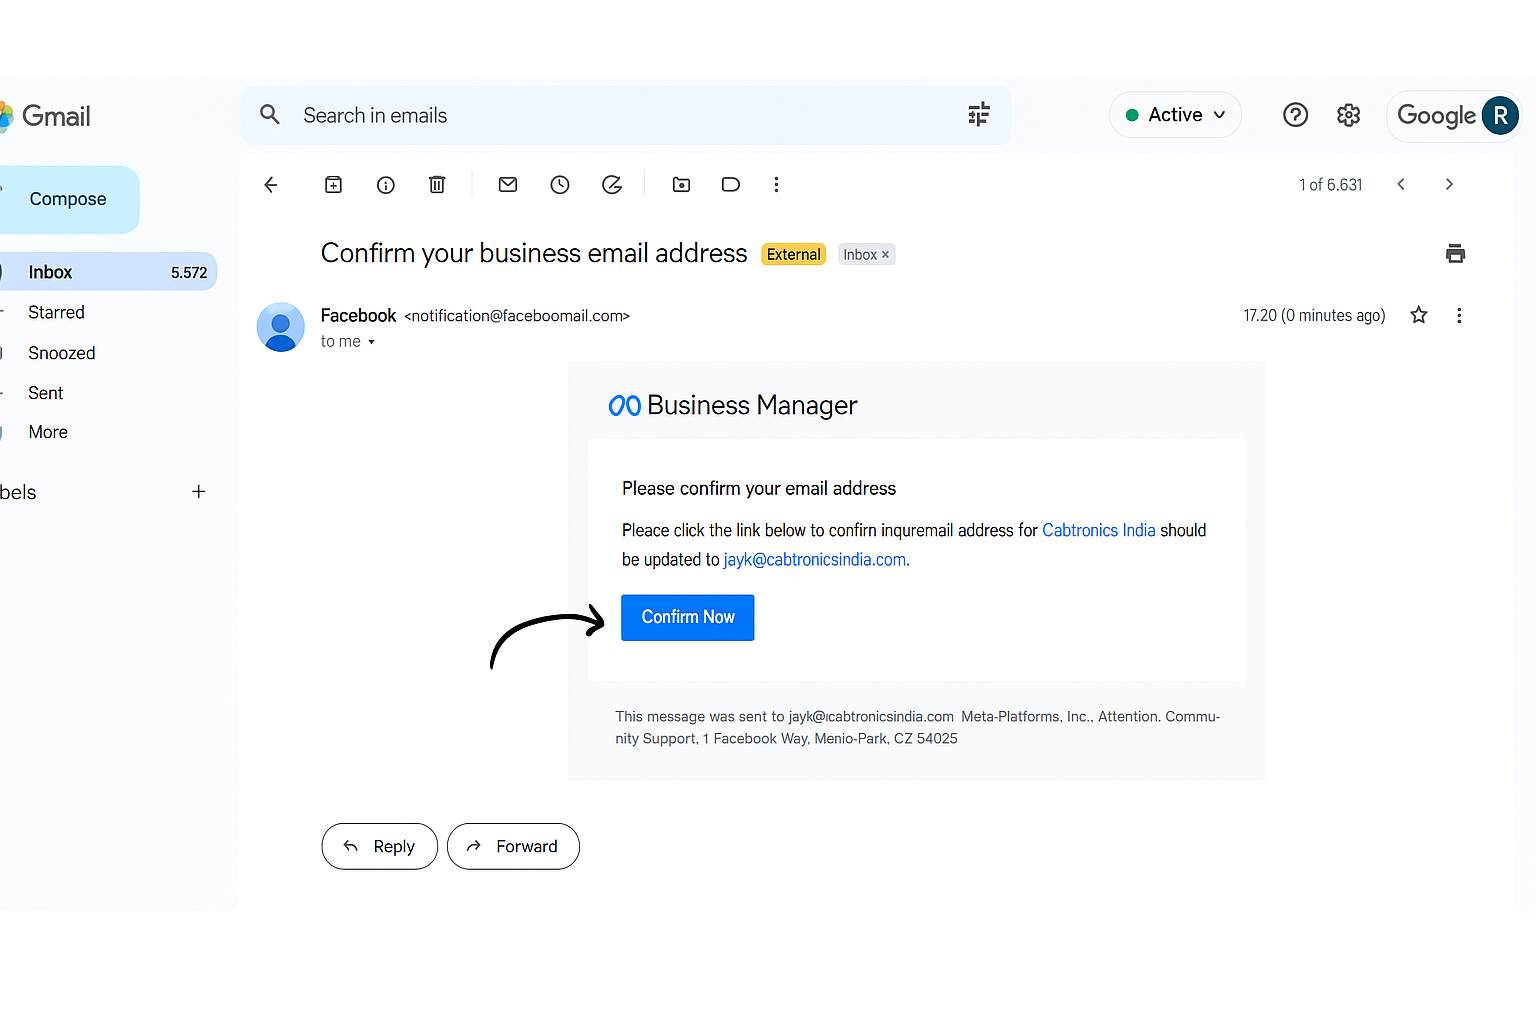
Step 6: Confirm Your Email Address
Meta will send a verification link to your email. Click on “Confirm Now” in your inbox.
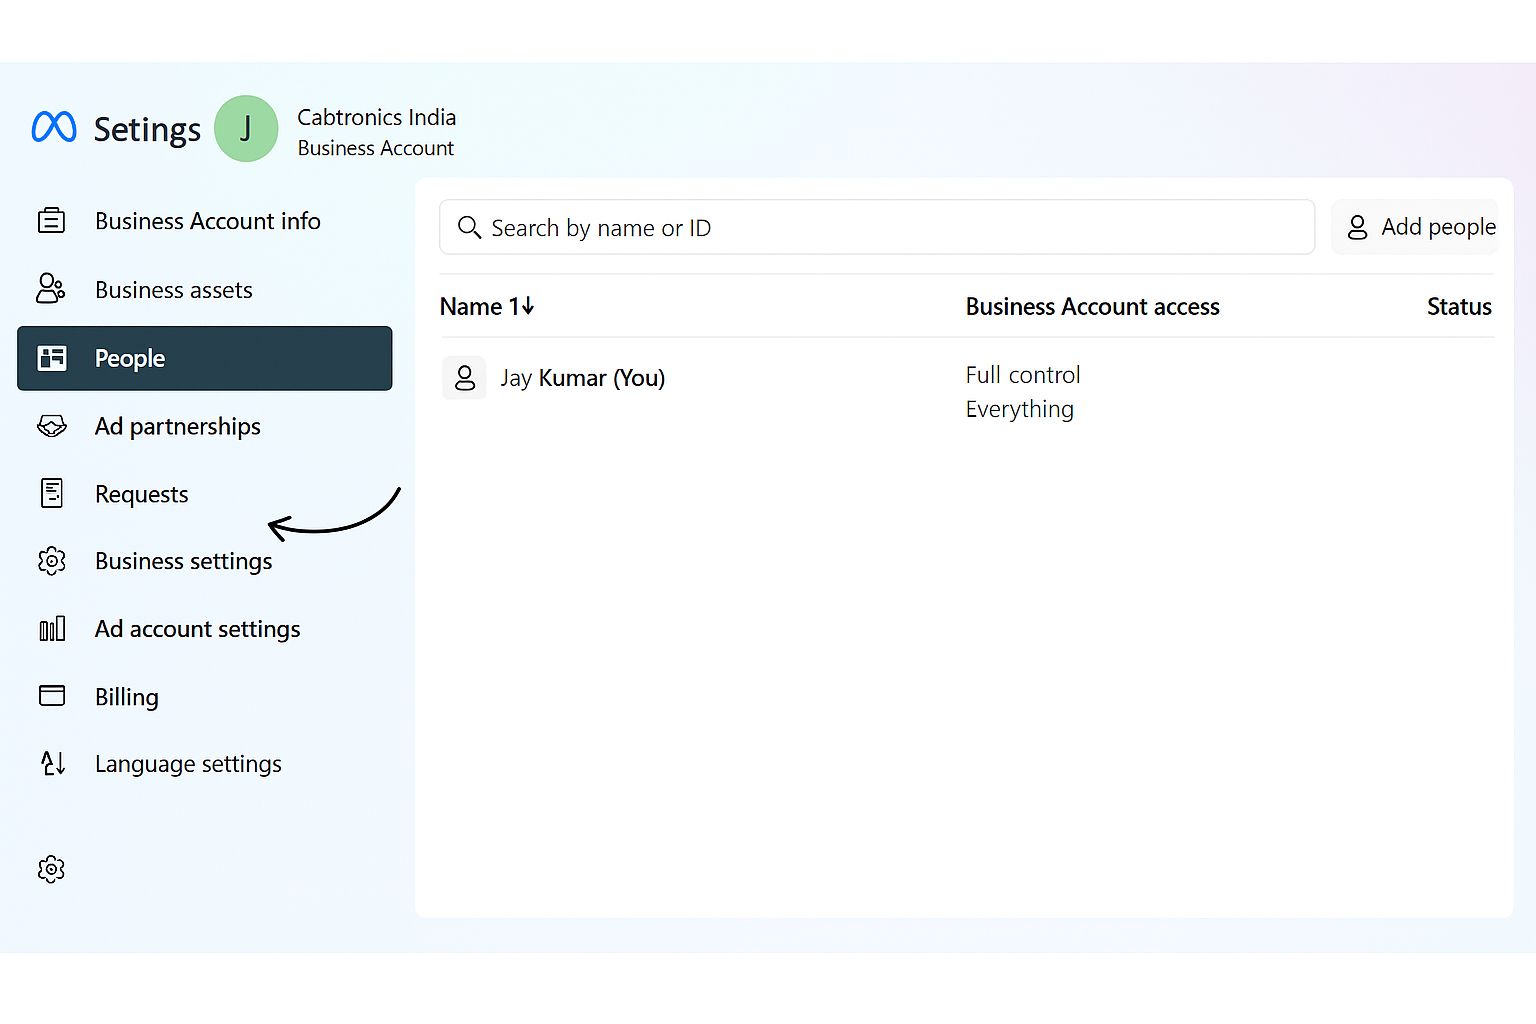
Step 7: Access Business Settings
Once confirmed, your Business Manager is ready. Head to Business Settings to manage verification, WhatsApp setup & more.
✅ Done!
Now you’re all set to link your Facebook Business Manager account with Automate AI and apply for WhatsApp Business API.
Need help with Business Verification or WhatsApp setup? Just contact our team!